Wallpapering with a laser: aligning the first strip straight
In this article
- What you need – and what you don't
- Step 1: plan the first wall and the starting point
- Step 2: set up the laser safely and securely
- Step 3: define a clear strip edge
- Worked example: allowing for a crooked corner
- Step 4: align the first strip over its full height
- Step 5: check the following strips
- Step 6: re-plumb the next wall at a corner
- Spot mistakes before the next strip follows
- Which laser makes sense for wallpapering?
- Short checklist before the first strip
- Frequently asked questions
- Conclusion
A crooked room corner is not a good starting point for straight strips of wallpaper. With a self-levelling line laser, you set an independent vertical reference line. This guide shows where to set up the laser, how to align the first strip and why you should check again on the next wall.
Short answer: Use the vertical line in self-levelling mode. Decide beforehand which edge of the strip should lie against it, and align the first strip over its entire height. The corner is used to determine the cut – not as proof of plumb.
What you need – and what you don't
For this task, a suitable line laser, a stable set-up, folding rule or tape measure and pencil are enough. Tools and paste for the wallpaper depend on the manufacturer's instructions. A 4D laser is not necessary for plumbing the first strip.
Without a laser you can use a spirit level or plumb bob. The laser is particularly convenient if you want to see the reference while hanging or are aligning several wall surfaces. It takes over the marking work, not the checking of substrate, pattern match and strip width.
Step 1: plan the first wall and the starting point
Check the actual roll width as well as the pattern and repeat. Decide whether the surface should be aligned to a room corner, a window or a central motif. With photo wallpapers, the numbered panel sequence may require a different start than with ordinary rolls.
So don't automatically draw a line exactly one roll width from the corner. If the corner is crooked, material may otherwise be missing at one end. Measure the corner at the top, middle and bottom against an imaginary plumb strip edge.
How corners are handled depends on the material. The wallpaper guide from rasch explains plumbing and product-dependent processing. The insert and instructions of your specific wallpaper remain authoritative.
Step 2: set up the laser safely and securely
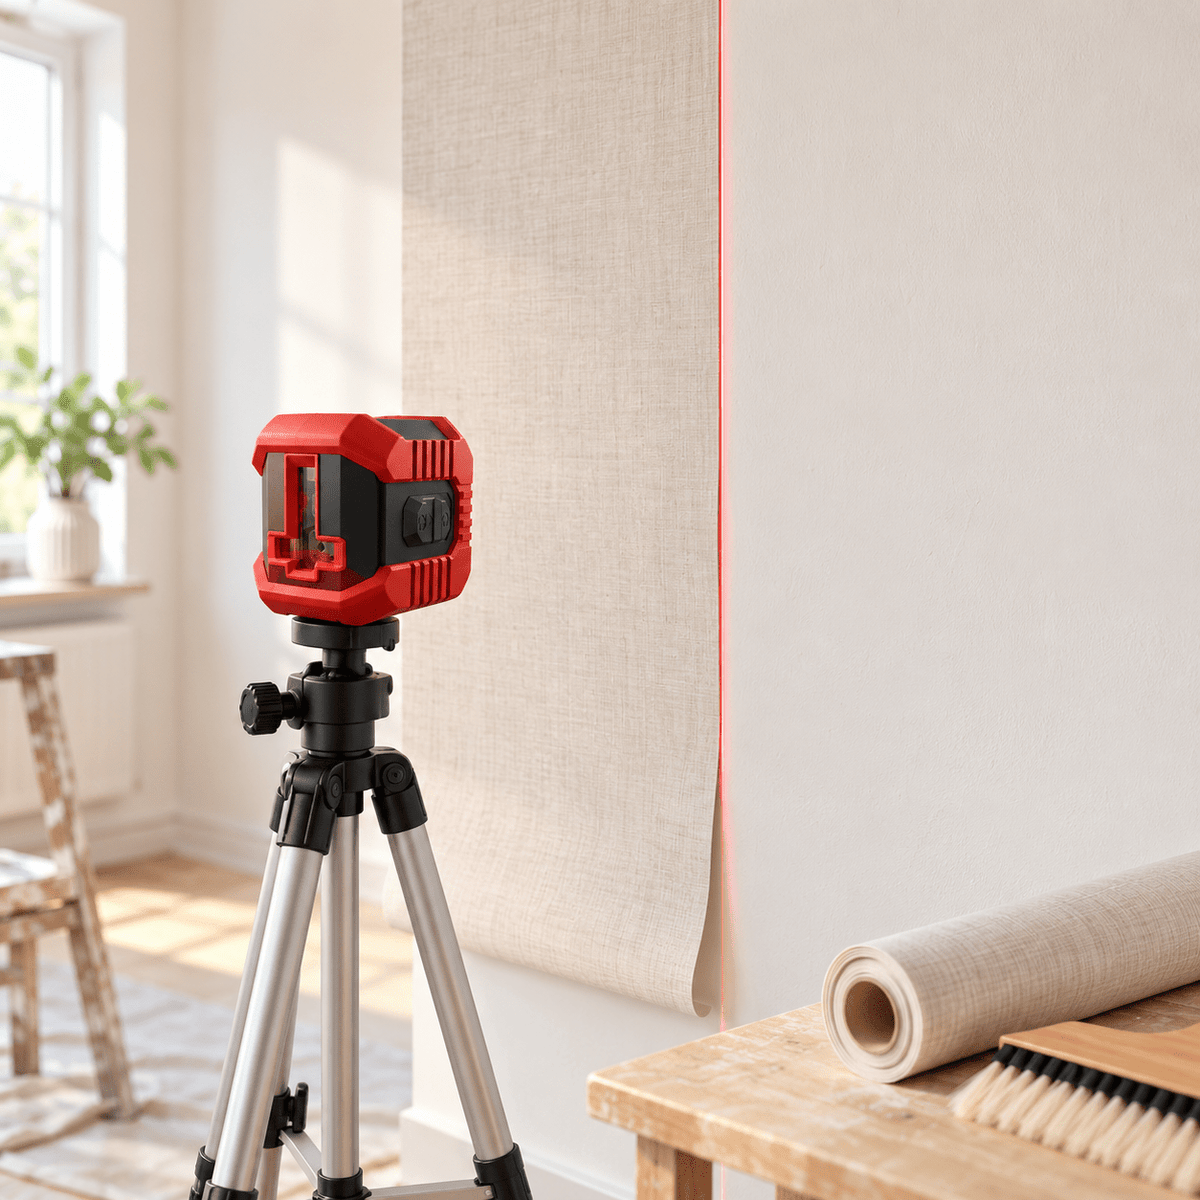
Position it on a tripod or suitable bracket so that the vertical line is visible along the entire planned strip edge. Keep the set-up out of your walking path. The line must not be constantly blocked by your body while pasting or hanging the strip.
Activate self-levelling mode according to the operating manual and let the tool settle. A locked, manually tilted line can look straight without being plumb. Clarify flashing lines or warning signals before using them as a reference.
Do not look directly into the beam and do not point it at other people. To check the accuracy of the tool, use the manual, not the possibly crooked corner of the room.
Step 3: define a clear strip edge
In the following example, the first strip starts on the left near the corner. Its right edge lies on the laser line. Mark this planned edge at the top and bottom and turn the tool so that the vertical line runs through both points.
Use the same reference throughout: for example the centre of the visible laser line. If you use its left side at the top and its right side at the bottom, you create a slight slant yourself. Check that the line remains visible between the markings.
Worked example: allowing for a crooked corner
Simplified planning example, not a measured site: The wallpaper strip is 530 mm wide. From the planned right edge of the strip to the left corner you measure 507 mm at the top, 500 mm in the middle and 495 mm at the bottom.
| Measuring height | Distance corner → plumb right strip edge | Remaining width of the 530 mm strip |
|---|---|---|
| Top | 507 mm | 23 mm |
| Middle | 500 mm | 30 mm |
| Bottom | 495 mm | 35 mm |
The strip can lie plumb with its right edge and reaches the corner at all three measuring points. On the left, different amounts of material remain for the intended corner finish. The values only show the geometric reserve; they are not a general specification for overlap or cut.
| Irregular corner Cut to local dimension |
First strip 530 mm total width |
Vertical laser line Reference for the right edge of the strip |
If the largest distance to the corner were more than 530 mm, the strip would not reach the corner there. Move the reference line before hanging. With very irregular corners, check additional measuring points, not just the three in the example.

Step 4: align the first strip over its full height
- Prepare the strip and paste according to the instructions for the type of wallpaper. Paper and non-woven wallpapers may require different processing.
- Place the strip at the top with the intended allowance.
- First align the defined strip edge with the vertical reference at the top.
- Check the same edge in the middle and at the bottom while the strip can still be corrected.
- Smooth the strip with the appropriate tool and then check again that the edge still lies on the reference.
A wandering pattern cannot be solved just by moving the laser. If plumb and edge are correct, check the repeat, match and handling of the strip. The laser aligns the strip; it does not create a matching pattern join.
Step 5: check the following strips
The next strip follows the previously correctly aligned strip and the intended pattern match. Regularly check a new strip edge with a plumb reference, especially if a visible offset is building up.
A single vertical line only ever checks the spot you have set it to. Only move or turn the tool after you have secured the previous reference with markings. After each repositioning, the set-up must be correct again.
Step 6: re-plumb the next wall at a corner
Do not adopt the course of a strip taken around the corner without checking. Establish a new vertical starting reference on the next wall. This prevents a crooked corner from dictating the alignment of all subsequent strips.
How much material is taken around the corner and how the join is made depends on the wallpaper and substrate. Use the corresponding processing instructions; a single figure in millimetres does not work for every wallpaper. The same applies at windows and niches: plan cut and join locally, align the visible strip plumb.
Spot mistakes before the next strip follows
| Problem | Likely check point | Check |
|---|---|---|
| The strip follows a crooked corner | Corner used as starting reference | Measure strip width against an independent plumb line |
| The reference suddenly shifts | Tripod or bracket touched | Hit the top and bottom marks again |
| The line is straight but not vertical | Manual tilt mode or wrong set-up | Check operating mode and warning display according to the manual |
| The pattern does not match despite a straight edge | Repeat, match or processing | Check manufacturer's instructions and cut |
| The corner remains open in places | Only one distance measured | Check several heights and correct the starting position before pasting |
Which laser makes sense for wallpapering?
For the first vertical strip edge, a vertical line with suitable accuracy and visibility is enough. A 360° tool is more worthwhile if you also need horizontal reference lines all round. More planes alone do not make the wallpaper straighter.
- CONDTROL QB Set: compact cross-line laser with tripod for simple alignment work.
- Compare 2D cross-line lasers: for wallpapering and other occasional renovation tasks.
If you also want to choose a tool for ceilings, tiles and installation, read the guide to buying a cross-line laser. For plumbing a single strip, an existing plumb bob or a suitable spirit level is often enough.
Short checklist before the first strip
- Wallpaper width, repeat and starting sequence checked?
- Distance to the corner measured at the top, middle and bottom?
- Reference to left or right strip edge clear?
- Self-levelling active, set-up stable?
- Strip aligned over its full height?
- New plumb reference planned for the next wall?
Frequently asked questions
Which laser is suitable for wallpapering?
A self-levelling line laser with a vertical line is suitable as a plumb reference. Pay attention to stable set-up and visibility in the room. Several all-round planes are not required for this one task.
How far from the corner must the first laser line be?
That depends on the roll width, the course of the corner and the planned join. Measure at several heights and make sure the first strip reaches the corner everywhere. The worked example is not a universal starting rule.
Can I compensate for a crooked wall with the laser?
You can align the strip plumb independently of the crooked corner. The laser corrects neither the wall shape nor an unsuitable substrate. The necessary cuts result from the local dimensions.
Do I need a green laser?
What matters is whether you can see the line clearly under the actual lighting conditions. A red laser can be enough indoors. Don't choose by colour alone, but also by set-up and task.
Can you wallpaper without a laser?
Yes. A spirit level or plumb bob can provide the first vertical mark. The laser offers a visible reference during work and makes re-plumbing more convenient.
Conclusion
A straight first strip starts with a plumb reference line and a planned starting position. Measure the corner at several points, use the same strip edge as a reference throughout and re-plumb the next wall. A simple line laser is often enough for this – controlled use matters more than the number of planes.